Soda Fountain Restore

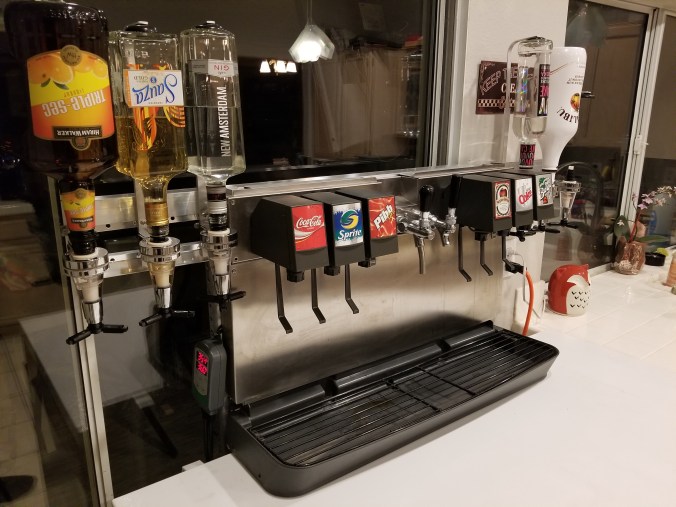
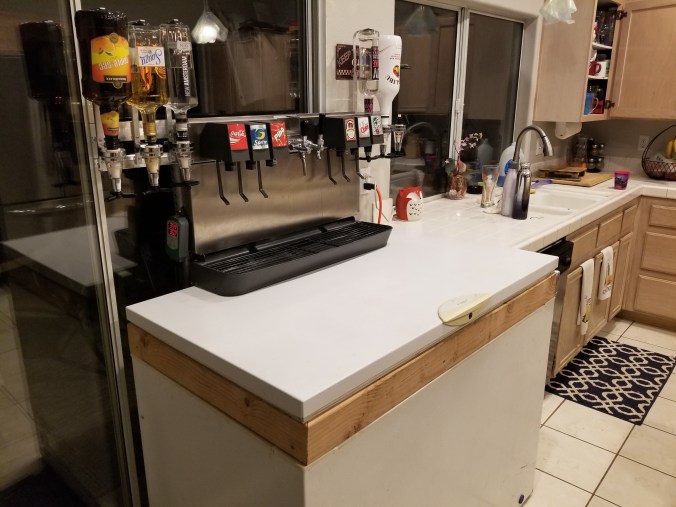
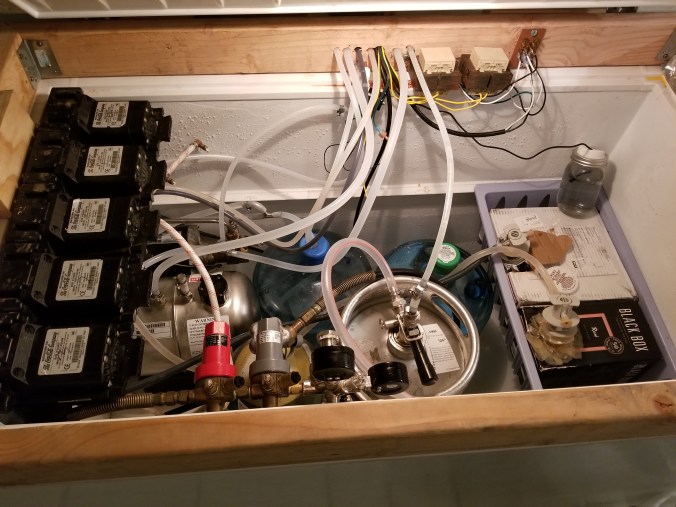
So I was looking for a stainless steel workbench for my garage and I found one on Craigslist with a soda machine attached to it. It was originally from a restaurant and so it was a full setup with an Ice hopper. In order for it to work it needed many bags of ice in the Ice tray to be cold enough for the CO2 to absorb into the water to stay carbonated. I didn’t want to have to purchase ice every time I wanted a soda and so I wanted to build it into a freezer to keep everything cold so it would be ready anytime I wanted a soda. It sat in my garage for a couple of years until I finally had enough time to work on it. There are a lot of DIY kegerator setups that are built the same way so I built a keg into it as well and also used a spare soda pump to add wine to it. To keep it stand-alone I didn’t want to route water to it and so I an using 5 gal bottled water as the water source that I keep cold in the freezer itself. The freezer has a temperature regulator that cuts power to it and maintains it just above freezing. I also added some inverted liquor dispensers with everything needed to make a nice long island ice tea.

20180822_213545.jpg
20180822_213613.jpg20180817_201543.jpg

GoPro Hero4 Silver w/ Z1 Rider Gimbal

So I finally got a new GoPro after I had the last 2 stolen, I haven’t had the best luck with these things. GoPro’s are excellent for taking high resolution videos but there is no image stabilization and the resolution means nothing when the video is bouncing around making the watcher motion sick. I have seen many great action videos that are completely unwatchable due to the camera bouncing around so much. The 3 axis gimbal makes the videos look amazingly smooth.
I went with the Z1 rider2 because it was fairly cheap and I plan on mounting it to a helmet so having a remote battery/ controller is the way to go.  there are plenty of other gimbals that are rigidly attached to the base but for some reason this gimbal doesn’t give you the option to attach it to the battery/controller. I modelled an adapter using Revit and printed it on my Prusa 3D printer.

WIN_20160211_23_01_17_Pro

I Also do some night shots and having a light is the only way to go so I picked up a light ring off Amazon. It was originally powered by a USB cable but having an additional battery and wire coming off the gimbal was sloppy. The Z1 has a connecter that can be used to charge the GoPro so I modded the cable to power the light ring instead and added a small switch.WIN_20160211_23_02_14_Pro

I unscrewed the glass lens off a waterproof case and put a small strip of electrical tape in-between the lens and the light to make a snug pressure fit and also put some tape inside the lens in-between the GoPro lens shroud and the glass case lens to make it snug. I originally had too much on there and when I took it off the GoPro lens shroud came off too, so dont make it too tight.

wire2

I cut the USB tip off the wire that came with the Gimbal, I will reuse it on another project. I have a spare in case I still want to use the GoPro charging feature.wire
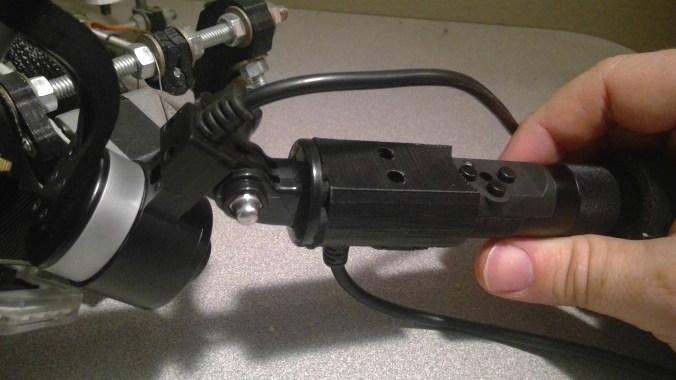
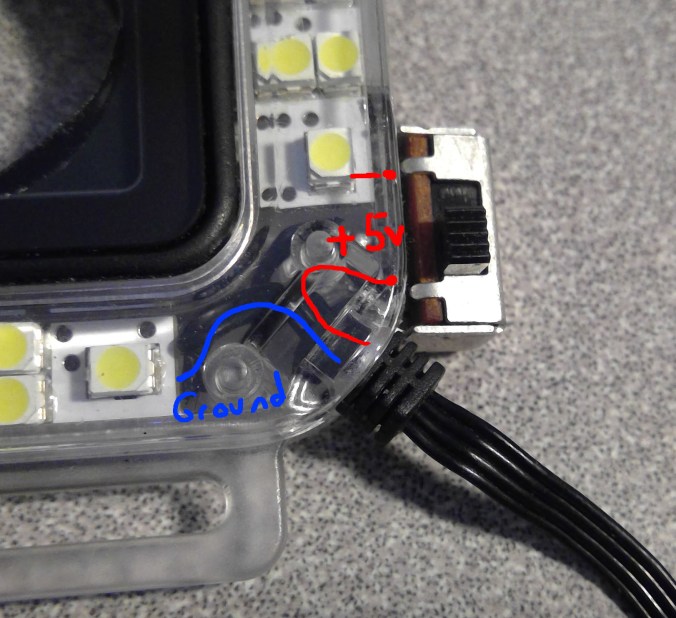
I soldered the switch pin directly to the back of the light where the original wire attached. Then I sandwiched the pins of the switch in-between the two halves of the light. I had to notch the plastic  a little to get it to close. WIN_20160211_22_30_47_Pro

Here is one of my first quick vids to show off how smooth the Gimbal makes the video, notice how the bike and the trailer is bouncing around but the horizon stays in the same place.

The 3d model of the adapter can be downloaded here: Thingiverse